

Limbo
On This Page
HP
Phases
Rewards
Mesos
Drops
 Distorted Ambition(x1)
 Grindstone of Faith(x1)
 Life Ring Box(x1)
 Limboroid(x1)
 Sol Erda Energy(x350)
Video Guides
Related Links
Battle Overview
Limbo (림보) is the final boss of the Carcion, Cradle of Life storyline, added in the Milestone update (KMS ver. 1.2.176, July 2024). Limbo stole the power of the Ancient God Keira and is trying to reach "the Source" in order to consume Carcion. The fight plays out inside an imaginary space Limbo has reconstructed from fragments of truth and memory, and it runs across three phases with a different Specter (or pair of Specters) in each.
- Level: 285 (Normal and Hard)
- Defense (PDR): 380% (Normal and Hard)
- Required Authentic Force: 500 (Normal and Hard)
Throughout this guide, two damage figures written as "30% / 40%" mean Normal / Hard. All damage is a percentage of your max HP.
Erosion Value (Death Count)
Limbo has no conventional death counter. Each player carries an Erosion Value that starts at 0; reaching 1000 ejects that player from the fight. Dying with HP at 0 adds 150 Erosion. Most of Limbo's patterns raise Erosion on hit, and a few mechanics lower it.
Risk Gauge and Spirit Purification

The semicircular gauge at the top of the UI is the Risk Gauge. The round blue gauge fills over time, and when it is full you can cast Spirit Purification with the Harvest / NPC Chat key. The Purification gauge drains whenever you are hit by any pattern, so avoiding damage in general is what keeps the skill available.
What Purification does changes per phase and per form, and this is the backbone of the whole fight:
| Segment | Risk Gauge behaviour | What Spirit Purification does |
|---|---|---|
| Phase 1 (both) | Personal, starts at 100% | -10% Risk per use |
| Phase 1 - A | Also grants 5s of immunity to the erosion area | |
| Phase 1 - B | Also regenerates one nearby platform | |
| Phase 2 (both) | Shared by the party, starts at 0% and rises +4% per second | Reduces the shared Risk Gauge |
| Phase 3 (both) | Personal, starts at 100% | -10% Risk per use |
| Phase 3 - Black | Also removes one contamination zone and grants 5s of erosion-area immunity | |
| Phase 3 - White | Also erases a Wall of Thought |
In Phases 1 and 3, whatever Risk remains when the space transition or form change happens is converted directly into Erosion, so you need roughly 10 Purification casts per space to cross cleanly.
Phase 1 alternates between two modes, A and B, with a spatial transition about every 1 minute 40 seconds. The timer is displayed underneath the Erosion Value.
A shared pattern runs in both modes: in A mode four objects are generated in sequence every 15 seconds, in B mode three every 11 seconds. Getting hit deals 20% HP and raises Erosion by 10 / 15.
Phase 1 - A (Specter A)
Specter A uses zone control. A circular zone forms around the boss and everything outside it is the erosion area.
Stepping into the erosion area summons the Abyssal Presence, which disappears immediately once you return inside the zone. It periodically pulls a moving character to one point, dealing 20% HP and a 1-second stun.
While outside the zone, Erosion rises by 10 first, then by 3 every second.
Once a character moves into the erosion area, several square zones appear on the map. When a square's border flashes, being hit on the border deals 15% / 20% HP and 2 seconds of confusion.
- Attack 1
- Attack 2: runs backward, strikes behind with the shield, then attacks forward with the sword. 30% HP, knockback, 1s stun, cooldown 10s.
- Attack 3: the mirror of Attack 2 - runs forward, sword in front, then shield behind. 30% HP, knockback, 1s stun, cooldown 10s.
- Attack 4 - Barrier Sequence: a three-stage pattern built around a wall in the middle of the map.
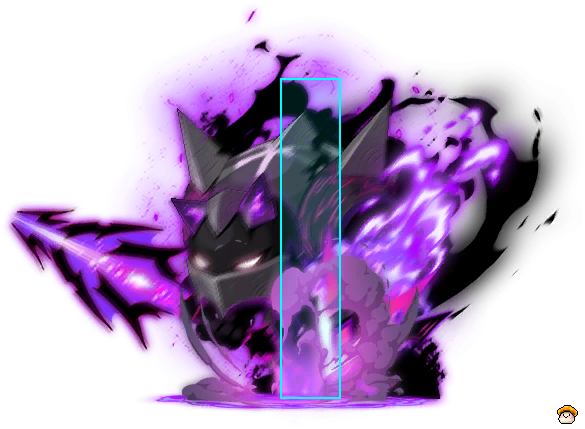
First a barrier is created in the center: 20% HP and knockback, cooldown 25s. The barrier cannot be crossed.
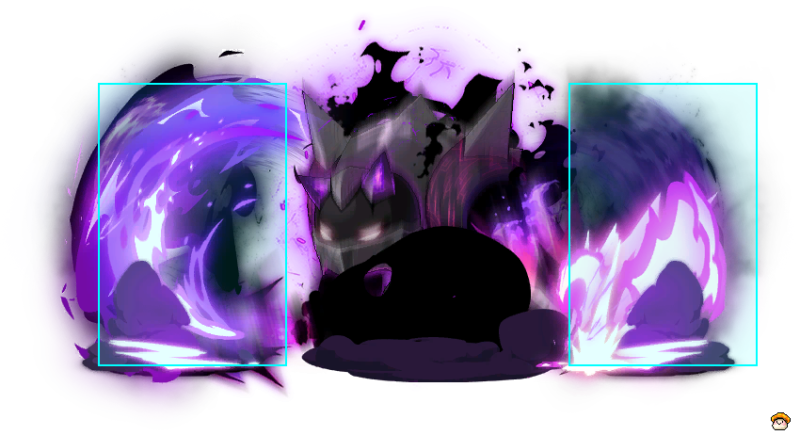
It then attacks enemies away from the barrier for 30% / 40% HP and knockback. Sticking to the barrier keeps you safe.
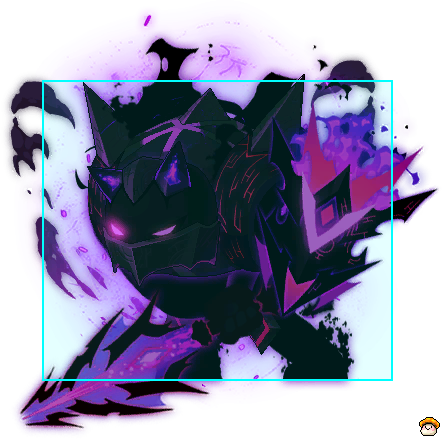
Finally it destroys the barrier as an attack for 30% / 40% HP and knockback. This time you are safe only if you are away from the barrier, so the two stages demand opposite positioning back to back.
Phase 1 - B (Specter B)
Every 30 seconds one random floor block disappears. Spirit Purification regenerates one platform near you, which is the only way to fight the map's decay.
Falling off the bottom teleports you to a nearby platform and raises Erosion by 50.
Bouncing Specters are summoned that move 1-2 blocks at a time in a single direction. Being hit at the moment they touch the ground deals 20% HP and knockback, cooldown 25s / 20s.
- Attack 1: disappears, then slams down on one targeted character. 50% / 60% HP, cooldown 8s.
- Attack 2: destroys the platforms to the boss's left and right. The platform explosion deals 40% HP and a 2s stun, cooldown 60s.
- Attack 3: hides in the floor and tracks one character quickly, then erupts. 80% HP on the way up, cooldown 45s. If there is no platform where it surfaces, it teleports to a nearby one.
Defeating Specters A and B moves the party to Phase 2.
Tips for Survival
- Press Spirit Purification the moment it is available. In Phases 1 and 3 you need roughly 10 casts per space to zero out the Risk Gauge before the swap, and any leftover Risk converts straight into Erosion.
- Phase 2 is the exception: the Risk Gauge is shared and climbs 4% per second on its own, so the party has to spread Purification casts rather than each player hoarding them.
- In Phase 3, Purification is doing two jobs at once - lowering Risk and deleting a contamination zone (Black) or a Wall of Thought (White). Skipping casts pushes you toward the 6-stack berserk faster.
- Avoid getting hit even by patterns that do not raise Erosion, because every hit drains the Purification gauge and Purification is the currency the whole fight runs on.
- Black Limbo's Charge and Throw is the pattern to respect most: a 2.55-second stun, Erosion +50 / 100, and a throw that can dump you into a contamination zone with no time to react.
- Remember the inversion in the White berserk - you must take two blue hits to create the Purification Wave, while every other Purification Wave sequence is about avoiding damage to preserve its size.
Pattern clips sourced from the Naver blog seotbeo.